Instructions for My eTalk School students
Content:
- Terms and Conditions and Rules of the Platform at eTalk Online School
- Authorization and Login
- Select the time zone
- Technical verification
- Entering the lesson
- Chat with the teacher during the connection and technical verification phase
- Whiteboard Tools
- Personal correspondence with the teacher
- Canceling a class
- List of past lessons
- Сlass Review
- How to book new lessons
- Screen Demonstration
- Homework
1.Terms and Conditions and Rules of the Online School Platform
- Classes are only conducted by pre-payment, you must purchase a package of 5 to 40 classes, choosing a lesson length between 25 and 50 minutes and the category of the teacher.
- All paid classes are available for 12 months from the date of payment. You may take a break during the term for any reason (vacation, vacations, illness, or just taking a break). However, if paid classes in the purchased package are not attended within 12 months from the date of payment, such classes are expired.
- Any class can be cancelled without a 2-hour cancellation or penalty. But if you plan to be absent from a pre-planned lesson that is on the calendar, please let the teacher know as far in advance as possible (1-2 days in advance, this will help the teacher plan his/her day better).
- We strongly recommend for operative communication to sign up for support chat.
2. Authorization and Login
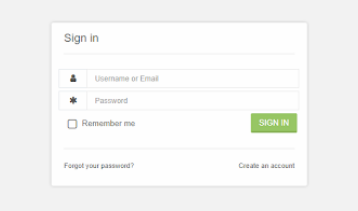
Attention: it is recommended that you use the latest version of the Chrome browser. You’ll have the best learning experience if you connect from a laptop/desktop computer rather than a tablet or phone. We also recommend using a headset. Go to the link https://my.etalkschool.com/ , enter the username and password the school administrator sent you and click “SIGN IN”.
3. Select the time zone
After logging in, at the top of the page you will be asked to update your time zone settings. Select your country of residence and click the “Save” button.

If your account has the wrong time zone, you can change it by editing your profile.

4. Technical verification
You can always take a technical verification before the lesson begins. To do this, click on the link https://my.etalkschool.com/troubleshooter/.
5. Entering the lesson
To enter a lesson, locate the “Upcoming Classes” list that matches the date and time of the class and click on the “Enter Class” button.

After that, the system will ask you to pass the video and sound checks.
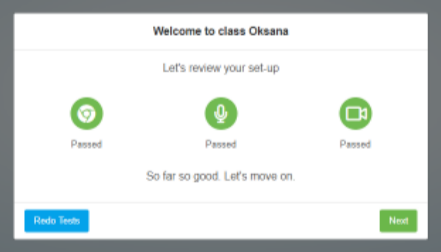
In this window, you need all the icons to be green, which means that your video, audio, and browser must be working properly. Otherwise, you will not be allowed into the lesson. If all the icons are green, press the “Next” button.
Next, the microphone, camera and sound are checked. If you see your display in this window, then check the box next to “Camera Check”. If you see movement from the sound, then check the box next to “Microphone Check”. Click on the red “Test Sound” button. If you hear a bell sound, then check the box next to “Speakers Check”. Press the “Next” button.

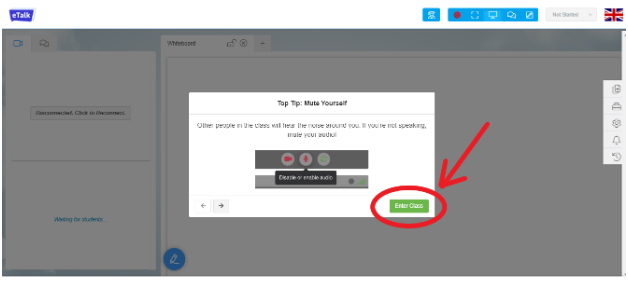
After that, press the “Enter Class” button.
6. Chat with the teacher during the connection and technical verification phase
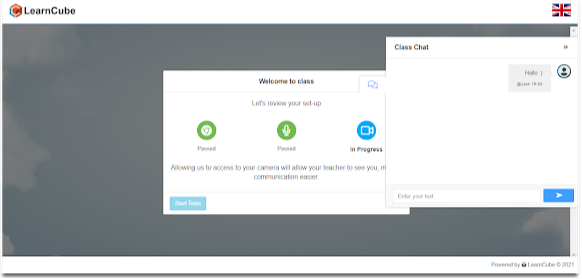
At the stage of connecting and testing the system, there is also a chat room where you can write if you have problems.
IMPORTANT
- You can enter the lesson no earlier than 10 minutes before it starts.
- Access to the lesson will be closed 15 minutes after the start of the lesson.
- You may cancel a class at least 2 hours before the beginning of that lesson (more information on canceling a class in paragraph 9)
7. Whiteboard Tools
The student has access to Whiteboard Tools, which can be used for drawing and writing. Whiteboard Tools can be found at the bottom of the page, the blue button with the picture of a pencil on it.
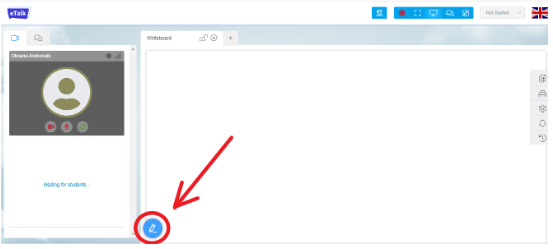
With the Whiteboard Tools, you can:
a) Choose a pencil color To do this, click on the “Whiteboard Tools” button and click on the top button “Select Color” – the colored circle. After that, an additional panel will appear with the colors available to you, click on the color you want.
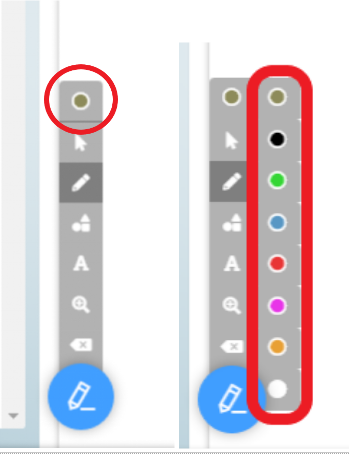
(b) Paint. To do this, click on the “Whiteboard Tools” button and click on the “Paint” pencil button. After that, an additional panel will appear in which you can select the function you want:
- Pencil.
- Marker.
- Clear.

After selecting the desired function, click the left mouse button and you can draw on the board or erase the unnecessary.
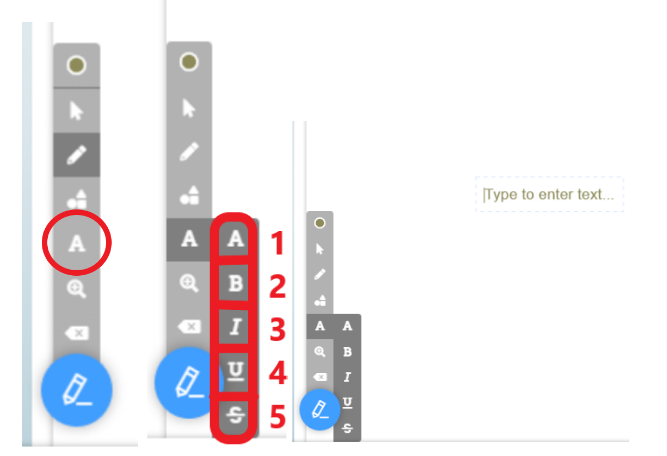
c) Write text. To do this, click on the “Whiteboard Tools” button and click on the “Add Text” button. This will bring up an additional panel where you can choose the font you want:
- By default.
- Bold font.
- Italics.
- Underlined.
Crossed out.
After choosing the font you want, click on the spot on the board where you want to write the text – a “Type to enter text” window will appear. Enter the text you want in this window.
8. Personal correspondence with the teacher
In order to write a message to the teacher, in the “Upcoming Classes” list, under the name of the teacher, click on the“Message” button.

If you already have correspondence with your teacher, you can click on the envelope button on the top panel of your account and continue your correspondence there.

9. Canceling a class
There are two ways to cancel a class:
- Call an eTalk manager or write to the chat room.
- Cancel the lesson in the system yourself.
If you want to cancel the lesson yourself in the system, then find in the “Upcoming Classes” list the lesson that you want to cancel corresponding to the date and time, and click the “Cancel” button.
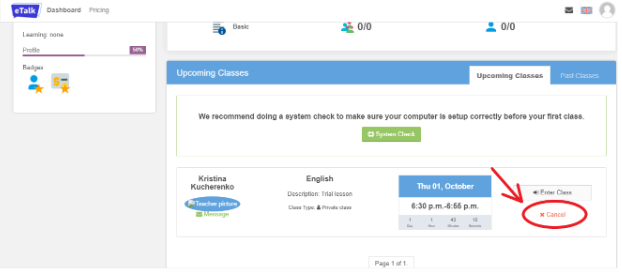
You can cancel a class at least 2 hours before the start of that class. If you cancel less than 2 hours in advance, you will still be charged 1 visit.
10. List of past lessons
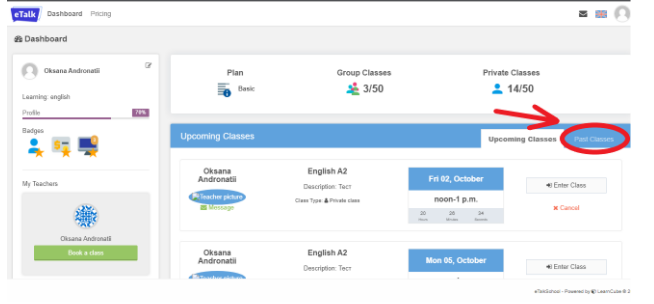
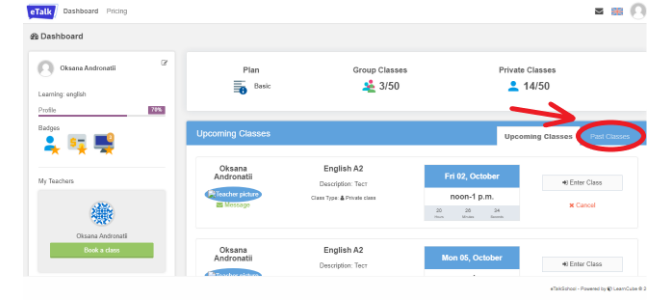
To see classes that have already taken place, click on “Past Classes” in the “Upcoming Classes” panel.
11. Сlass Review
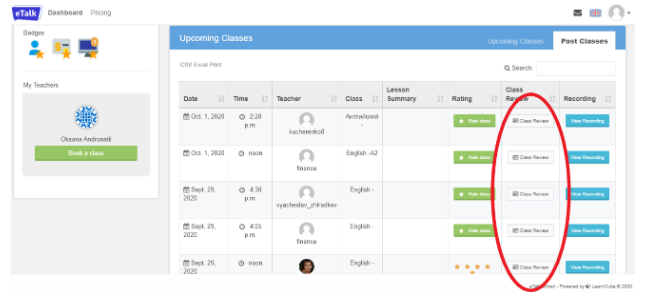
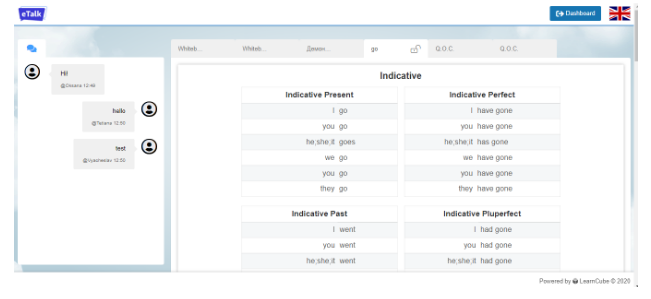
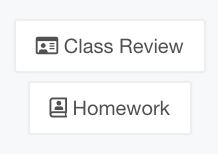
In the “Past Classes” tab, you can see all of your past lessons. You can go to a specific lesson and see lesson materials, chat with the teacher, and homework. To do this, click on the “Class Review” button.
12. How to book new lessons
To book new lessons, email eTalk support to ([email protected]) or send a message to the Support messenger.
If you want, we can include access to a teacher, and you can book your own lesson time among his available slots. Once this function is enabled, the “My Teachers” window will appear in your cabinet.
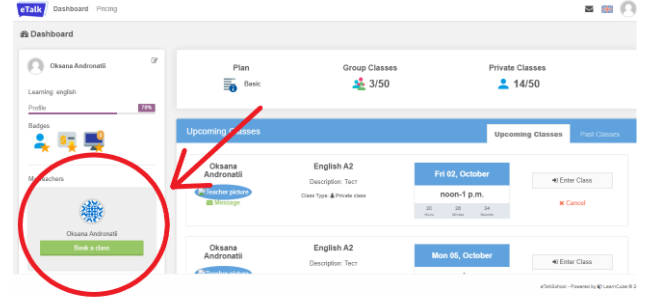
After clicking on the “Book a class” button, the teacher’s calendar will appear.
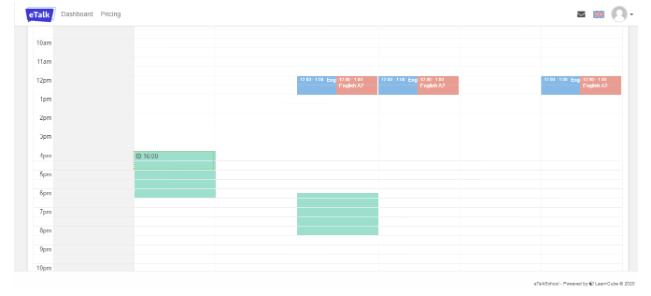
You can book only the time that is highlighted in green.
13. Screen Demonstration
To turn on the screen demonstration, click on the “Lesson Materials” button on the right-hand panel, select “Screen Share” and click on the “Start Sharing” button.
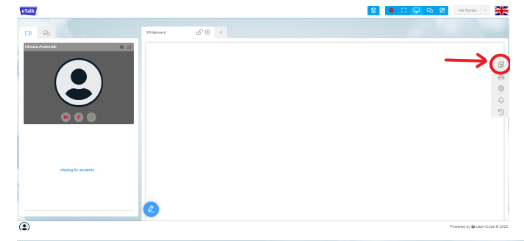
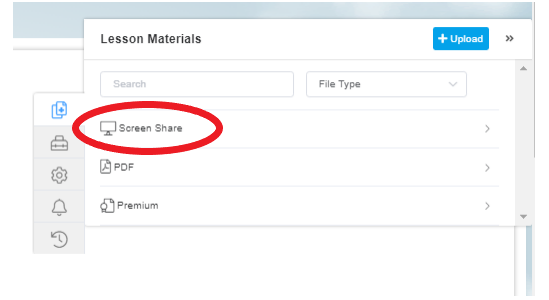
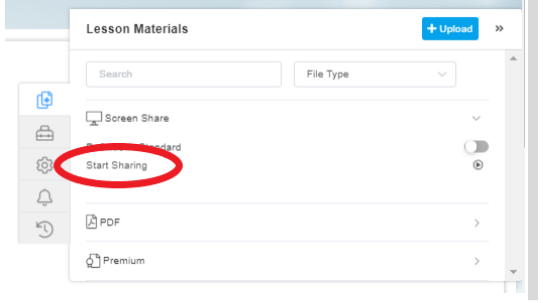
Next, a window will appear in which you will need to choose what you want to display: the entire screen, a program window or a browser tab. After selecting the screen you want, click on the “Share” button.
14. Homework
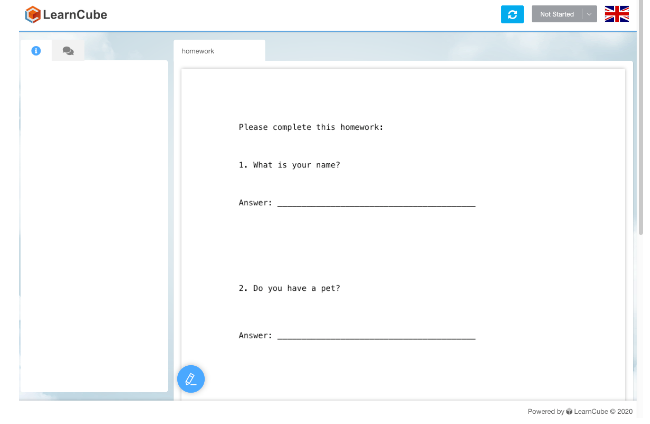
You can go to the homework page:
- Through the link that will be sent to your email. After your teacher sends you your homework, you will receive an email. When you click on the link in that email, you will be taken to the homework page:
2. On your personal page in my.etalkschool.
To do this, go to the “Past Classes” section and click on the “Homework” button.
In order to start homework, you need to click on the drop-down list and change the status:
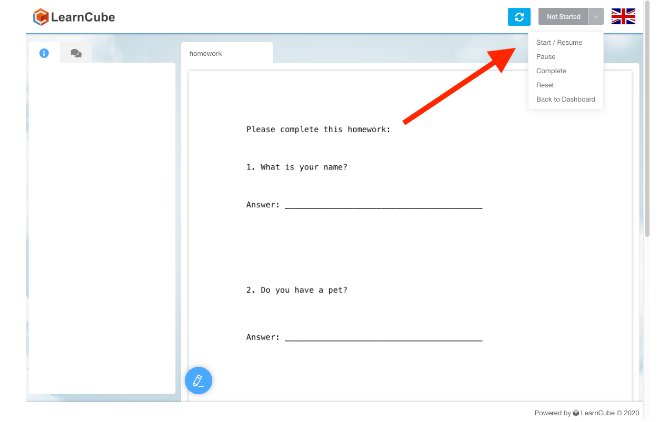
After you have completed your homework, you need to mark it as completed in the same drop-down list (top right). After that, the teacher will receive a notification that the homework has been completed:
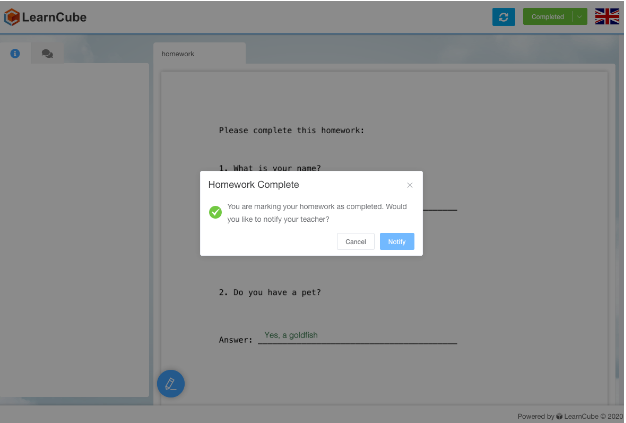
Be sure to set the status to Complete and click on the Notify button.
There is also a chat window in the homework window so that the student can ask questions asynchronously (or synchronously if both are online at the same time).


